Export Scanned JPG to PDF
Windows 11/10/8/7 | Fully Functional - No Limits - 15 Days Free | Safe & Secure Download

How to Change Scanned JPGs into a PDF File
Over the years, Adobe's Portable Document Format (PDF) has become the universal standard for sharing and storing digital documents. Its cross-platform compatibility ensures that PDFs can be opened on virtually any mobile device, computer, or operating system. If you have scanned documents saved as JPG files, converting them into a PDF is an excellent way to make them easier to share, organize, or store.
Using our JPG to PDF Converter, you can create a single, multi-page PDF document from multiple scanned JPG images. This feature is particularly useful for organizing and sharing documents digitally or preserving hard-copy materials for future reference.
Step-by-Step Guide to Convert Scanned JPGs to a PDF
1. Download and Install the JPG to PDF Converter
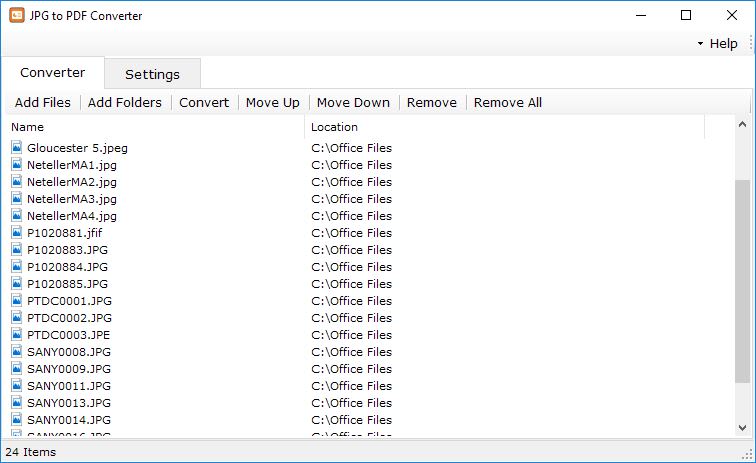
Start by downloading the JPG to PDF Converter software and installing it on your computer. The program offers a free 15-day trial for you to explore its features. Once installed, launch the application to access its user-friendly interface, as shown below.
2. Add Scanned JPG Files
To add your scanned JPG images, click the “Add Files” button to open a file selection dialog. From there, browse to the folder where your images are saved and select the files you wish to convert.
Alternatively, you can add entire folders of images by clicking on the “Add Folders” button. For added convenience, you can also drag and drop files or folders directly into the application's file list from Windows Explorer.
3. Rearrange JPG Files (Optional)
If you need to rearrange the order of your scanned images before combining them into a PDF, use the “Move Up” and “Move Down” buttons. This feature ensures that your PDF pages appear in the exact order you prefer, especially when dealing with multi-page scanned documents.
4. Customize Conversion Settings
Before starting the conversion, configure the output settings to suit your needs:
- Output Folder: Choose where your converted PDF files will be saved. You can either specify a custom folder or use the default option, “Save to the same folder as original files.”
- Output Mode: Select how your PDFs will be created:
- “Combine all JPG to one PDF”: Merges all selected JPG images into a single, multi-page PDF document.
- “Create separate PDF for each JPG”: Converts each JPG file into an individual single-page PDF.
- JPEG Quality: Adjust the quality of the images in the PDF. The quality can be set from 1 (lowest quality, smallest file size) to 100 (highest quality, largest file size). Choose the setting that best balances image clarity and file size.

5. Start the Conversion Process
Once all your JPG files are added, arranged, and the settings are configured, click on the “Convert” button to begin the transformation process. The software will batch convert all selected JPG files into professional-quality PDFs.
During the conversion process, a progress indicator will display the status. The time required will depend on the number and size of the files being converted.
6. Access the Converted PDF Files
When the conversion is complete, your output PDF files will be saved in the designated output folder. If you enabled the option “Open output folder after conversion”, the folder will open automatically, allowing you to view and use your newly created PDFs immediately.
Why Convert Scanned JPGs to PDF?
PDFs are more versatile and reliable than JPG images for sharing, printing, and archiving. They preserve document formatting, support multiple pages in a single file, and offer better compatibility across devices and platforms. Our JPG to PDF Converter ensures a seamless conversion process, allowing you to digitize and organize your scanned documents effortlessly.
Download the software today and enjoy the convenience of transforming your JPG images into high-quality PDF files!