Software User Guide
Windows 11/10/8/7 | JPG to PDF Converter Version 1.5 | Updated On Jan 15, 2023

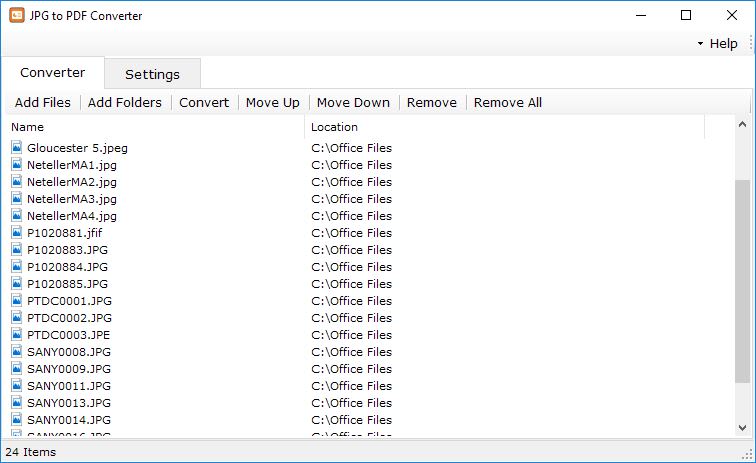
Adding Files to JPG to PDF Converter
The JPG to PDF Converter software for Windows makes it easy to add files for conversion. Follow the steps below to quickly add and organize your JPG files for seamless PDF creation.
Adding Files Using the "Add Files" Button
To start adding files, click the “Add Files” button in the software interface. This action will open the standard file browse and select window, allowing you to navigate to the folder where your JPG files are stored. From this window, you can select one or multiple files that you want to include in the conversion process.
Drag and Drop for Convenience
If you prefer a faster method, the software allows you to drag and drop files directly into the file list. Open Windows Explorer, locate the files or folders you want to convert, and simply drag them into the program window. This feature is particularly useful for users who like to work efficiently.
Adding All Files in a Folder
To include all the files in a specific directory, click the “Add Folder” button. This feature not only adds files from the selected folder but also includes files from any sub-folders, ensuring a comprehensive batch addition. It's perfect for users managing large volumes of files stored in organized directories.
Organizing Your Files
Once your files are added, the software provides tools for easy organization. You can use the “Move Up” and “Move Down” buttons to rearrange the order of the files in the list. This is particularly helpful if you are merging multiple JPGs into a single PDF and need them in a specific sequence.
Removing Files
If you need to adjust your selection, the software allows you to remove individual files by selecting them and clicking the “Remove” button. To clear the entire file list and start over, use the “Remove All” button. These options give you complete control over the files included in the conversion process.
Modify Settings in JPG to PDF Converter
Customizing your conversion settings is easy with the JPG to PDF Converter. This guide provides step-by-step instructions for setting the output folder, selecting output modes, and adjusting JPEG quality to achieve the desired results for your PDF files.
Output Folder
The software allows you to choose where your converted PDF files will be saved. By default, the output files are stored in the application's default folder. However, you can change this by browsing for a folder of your choice:
- Click the “Browse” button in the Output Folder section.
- Select a directory where you want the converted files to be saved.
- If you want to save the PDFs in the same location as the original JPG files, choose the “Save to same folder as original file” option.
To easily access your converted files after the process is complete, enable the “Open output folder after conversion” option. This will automatically open the destination folder once the conversion is finished.
Output Mode
The JPG to PDF Converter offers two output modes, allowing you to customize how your JPG files are converted:
- Combine All JPGs into a Single PDF: Select this option if you want all the selected JPG files to be merged into one PDF document. This is ideal for creating a consolidated PDF file, such as an album or presentation.
- Create Separate PDF for Each JPG: Choose this option if you prefer each JPG file to be converted into an individual PDF document. This is useful when you need separate PDFs for each image.
JPEG Quality
The software allows you to control the quality of your JPG files before conversion. Adjusting the JPEG quality affects both the image resolution and file size in the resulting PDF:
- Use the slider or input box to set the JPEG quality from 1 (lowest quality and highest compression) to 100 (best quality but least compression).
- Lower values result in smaller PDF file sizes but may reduce image clarity, making it suitable for email or web sharing.
- Higher values retain maximum image detail, ensuring professional-quality output but with larger file sizes.
Adjusting JPEG quality gives you the flexibility to balance image clarity and file size based on your needs.
Save and Apply Settings
Once you've configured the desired settings, they will automatically apply to the conversion process. These options are designed to provide you with a tailored conversion experience, whether you are working with single images or large batches of files.
Take full control of your conversions with the JPG to PDF Converter, ensuring your PDF output meets your exact requirements every time.

Start the Conversion Process
Once you have added all your JPG files and configured the necessary settings, you are ready to start the conversion process with the JPG to PDF Converter software. Follow the steps below to execute the conversion and retrieve your output files.
Step-by-Step Instructions
Begin the conversion by clicking the “Convert” button located at the bottom of the application window. This action initiates the process of transforming your selected JPG images into PDF files based on your chosen settings.
During the conversion process, a progress bar or status indicator will display the current progress of the operation. This allows you to monitor the software as it processes each file in your list.
Retrieving Your Output Files
After the conversion is complete, the software will save your newly created PDF files in the location you specified in the Output Folder settings. If you enabled the “Open output folder after conversion” option, the application will automatically open the destination folder, giving you instant access to your files.
Depending on your selected output mode:
- If you chose “Combine All JPGs into a Single PDF”, you will find one consolidated PDF file containing all the images you added to the list.
- If you selected “Create Separate PDF for Each JPG”, each image will be converted into its own PDF file and saved individually in the output folder.
Conclusion
With just a few clicks, the JPG to PDF Converter simplifies the process of transforming images into professional-quality PDF documents. Whether you are working on a single file or a large project, the intuitive interface and robust features ensure a seamless conversion experience.
Start your conversion today and enjoy quick, reliable results with the JPG to PDF Converter software!